How to Tell Which Lines Should Be Thicker Line Art

Line quality is an essential attribute to creating engaging line art. In this tutorial past manga creative person Jose Fernandez, learn simple yet effective tips to improve your lines in your artwork.
Line quality is i of the most of import aspects of manga and comic storytelling, just frequently forgotten about. Making your manga read clearly is crucial. It tin mean having someone proceed reading or quickly walking away. Whoever is reading your manga, they should be able to grasp what's going on instantly, especially since the majority of the readers will look at the panel for just a few seconds.
So, if we tin can ameliorate clarity with just line quality, why not! Let me show you how you lot tin improve your lines to assistance tell an engaging story.
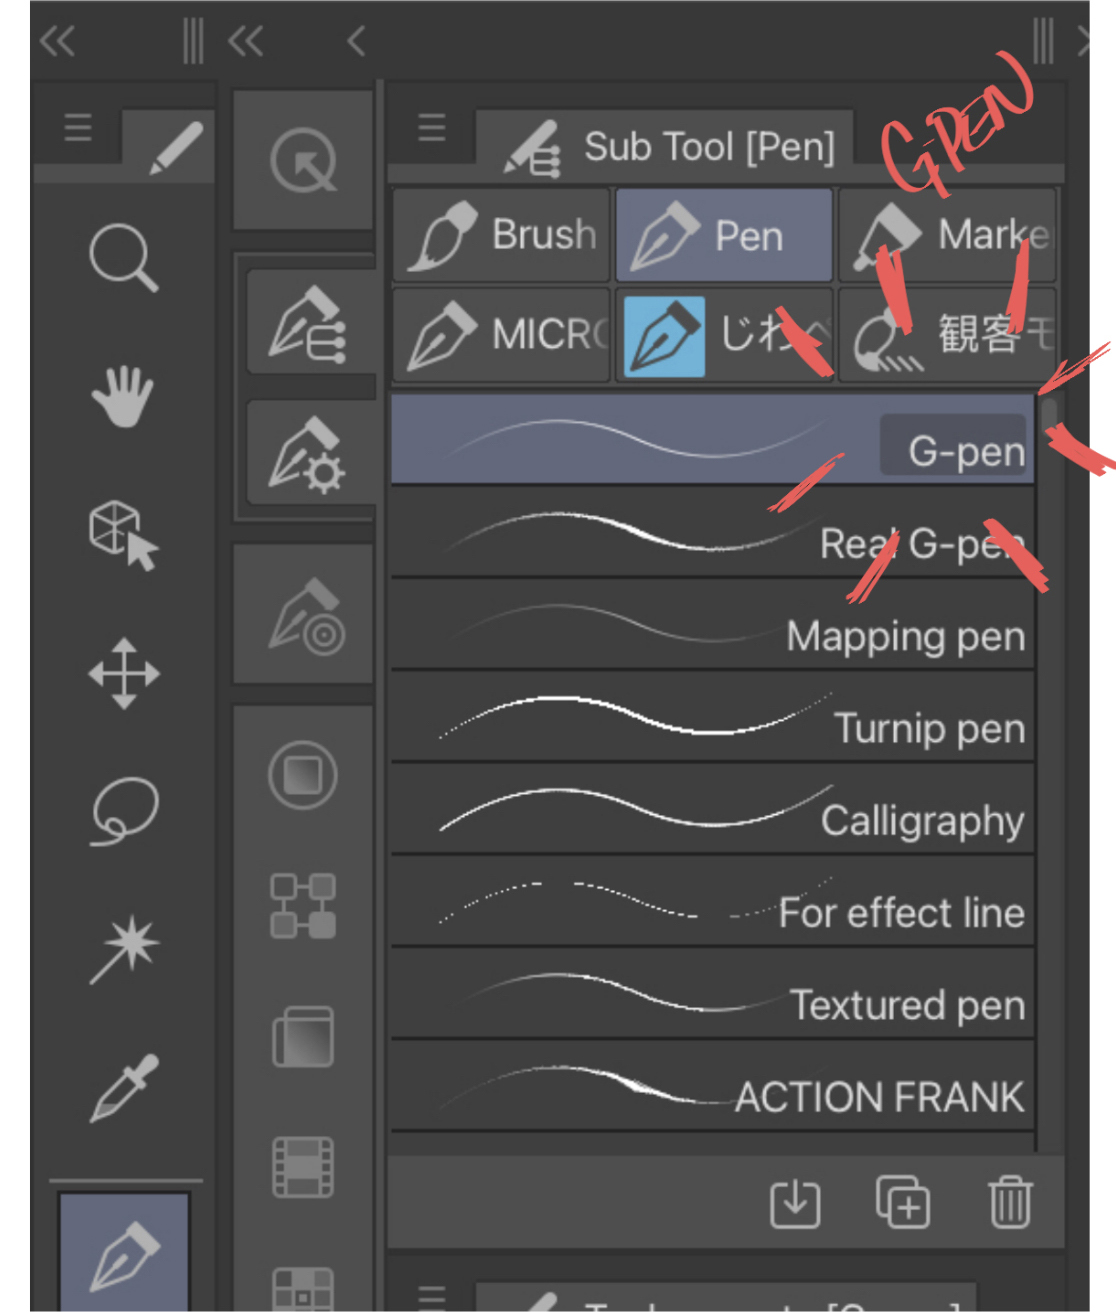
In this tutorial, I will be using the G-pen brush that comes stock with Prune Studio Pigment. Yous tin can apply other brushes, but if possible, apply one where you can vary the size with force per unit area sensitivity. I am too working on a canvas at 600 dpi.
Step 1
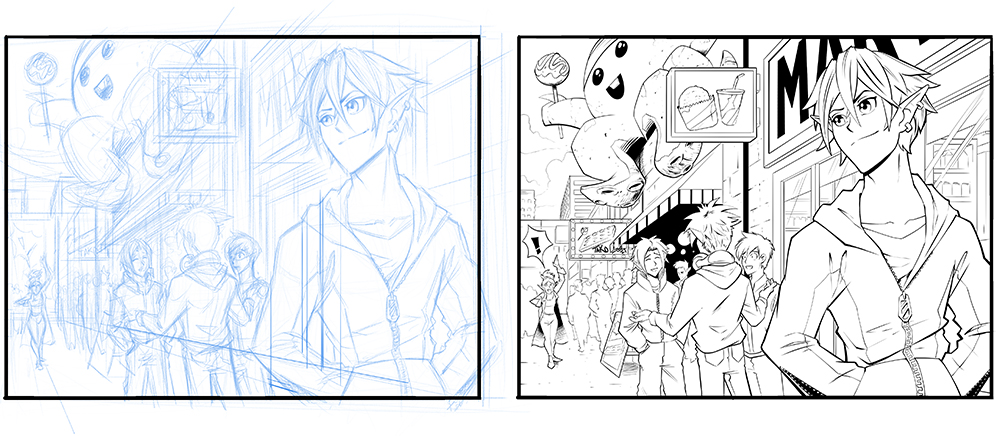
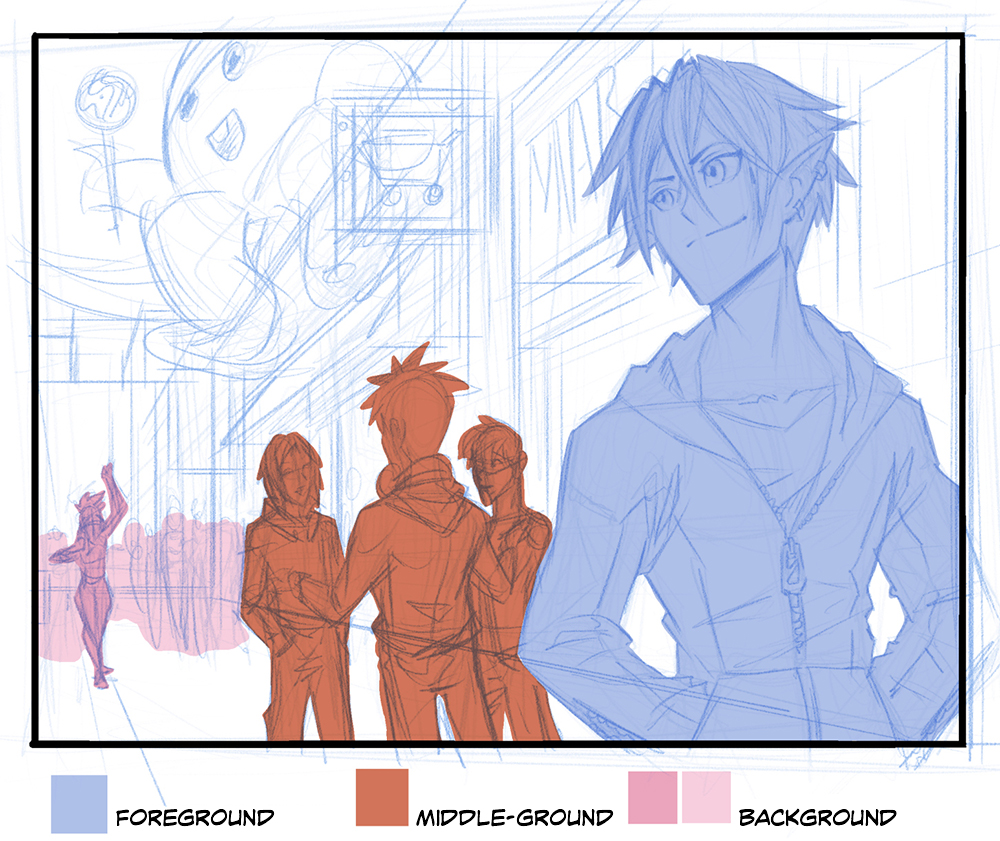
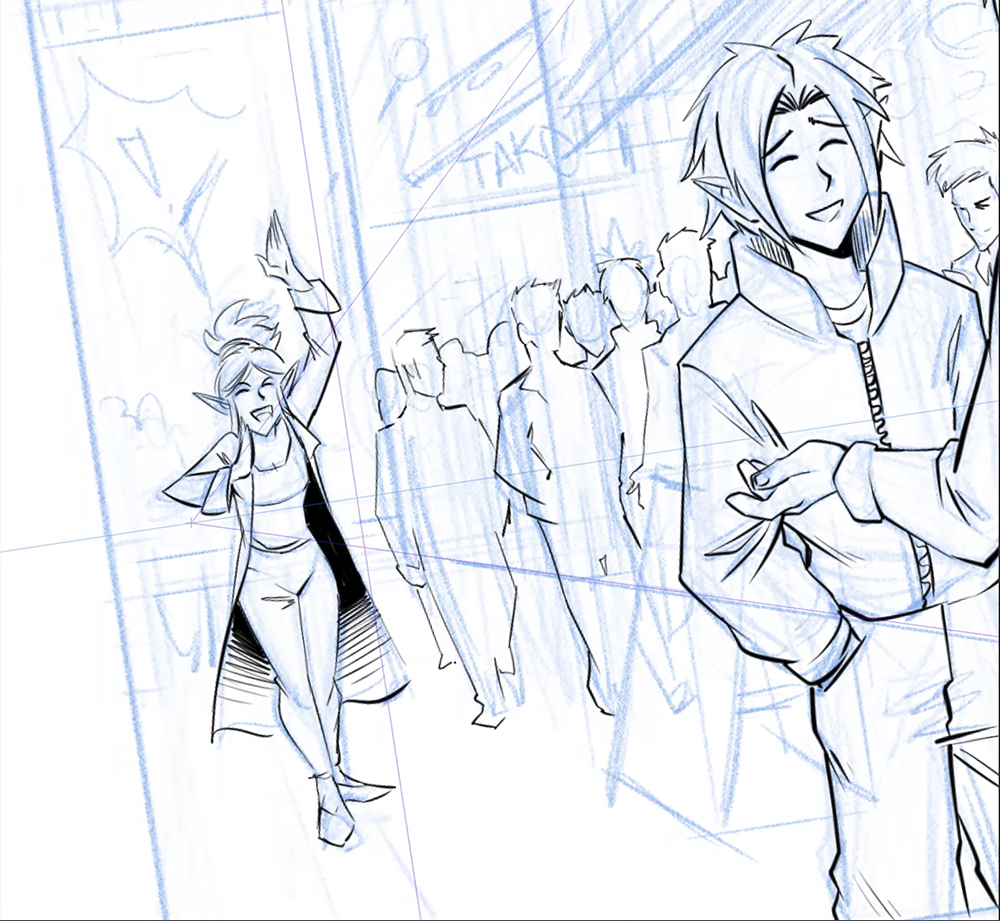
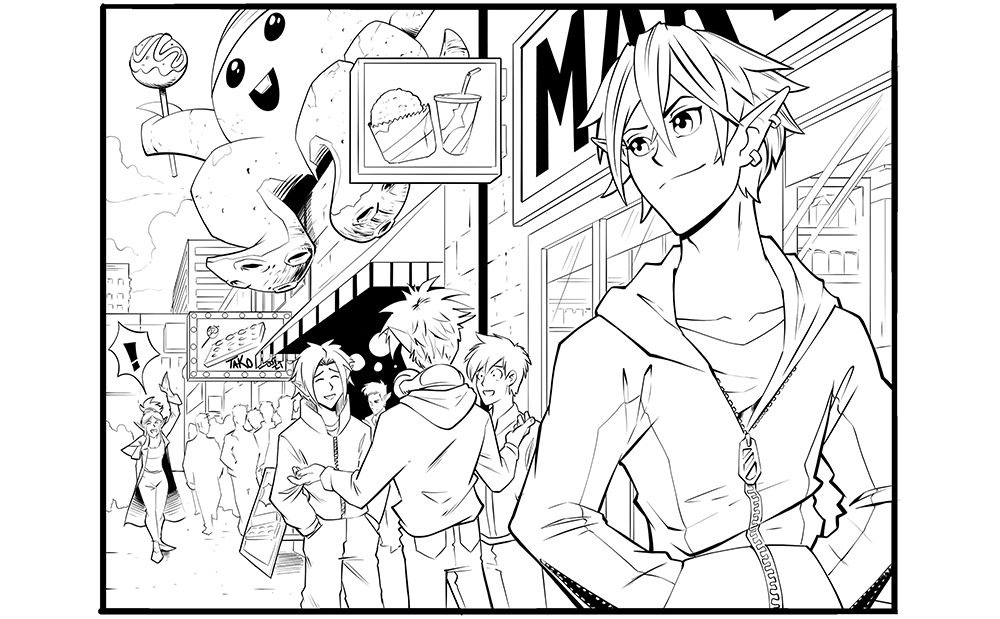
Determine your betoken of focus and the dissimilar layers of your composition, like your foreground, center ground and background, as each of these aspects will differ in line thickness.
Step 2
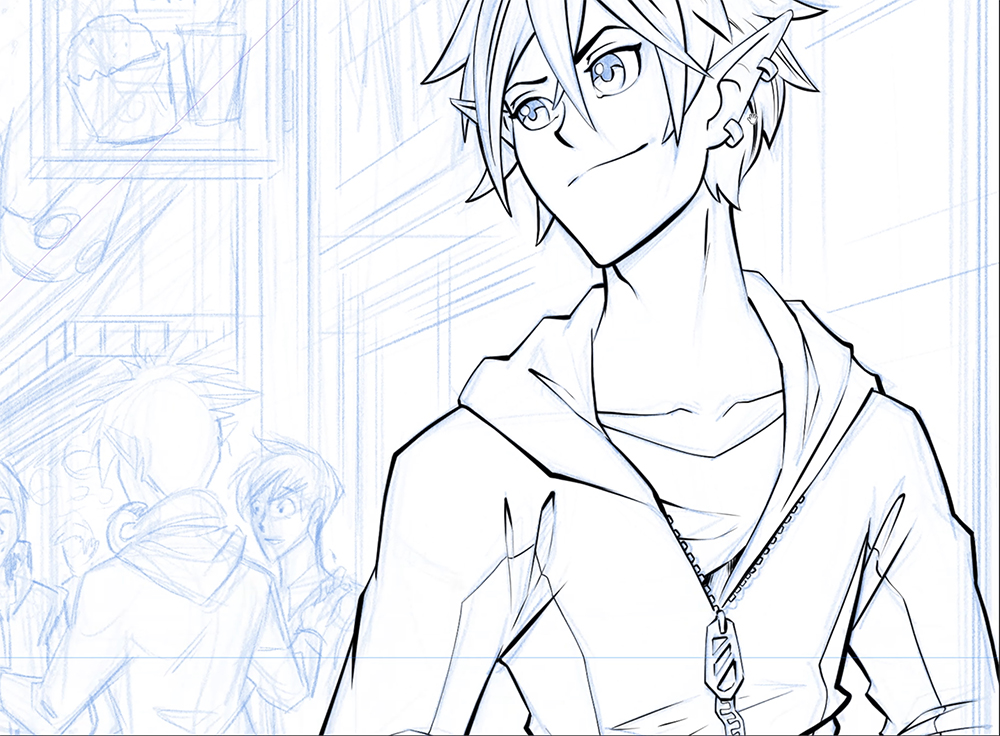
Begin inking your foreground characters and objects. Since the foreground is the closest to the reader, we want the outlines to be bolder and thicker! Subconsciously, the reader will think the thicker outlines are closer, and the thinner lines to be further abroad.
Effort and keep the lines within the outline thinner too. The outline of the character is sometimes called belongings lines, because they literally hold the characters and objects details together, giving it more solidity and making it easier to read.
Step three
Once you lot're washed inking the foreground, y'all can start inking the middle footing. What we have to go along in mind now, is to make the lines of the middle ground thinner than the foregrounds. This gives the illusion of depth and atmospheric perspective. It also separates the foreground and centre ground. The reader will be able to distinguish that the closest character is in a different aeroplane than the grouping of guys behind him.

Step iv
When y'all're done with the middle basis, you can start inking the groundwork, and the same dominion applies. Thinner lines the further people and objects are. But! You can too make exceptions… for instance, in this illustration I want to bring attention to the young woman in the groundwork shouting. So, I will brand her outline just a chip thicker than the other people and objects around her. Not besides thick though, as we still want to keep her in the groundwork.
Footstep v
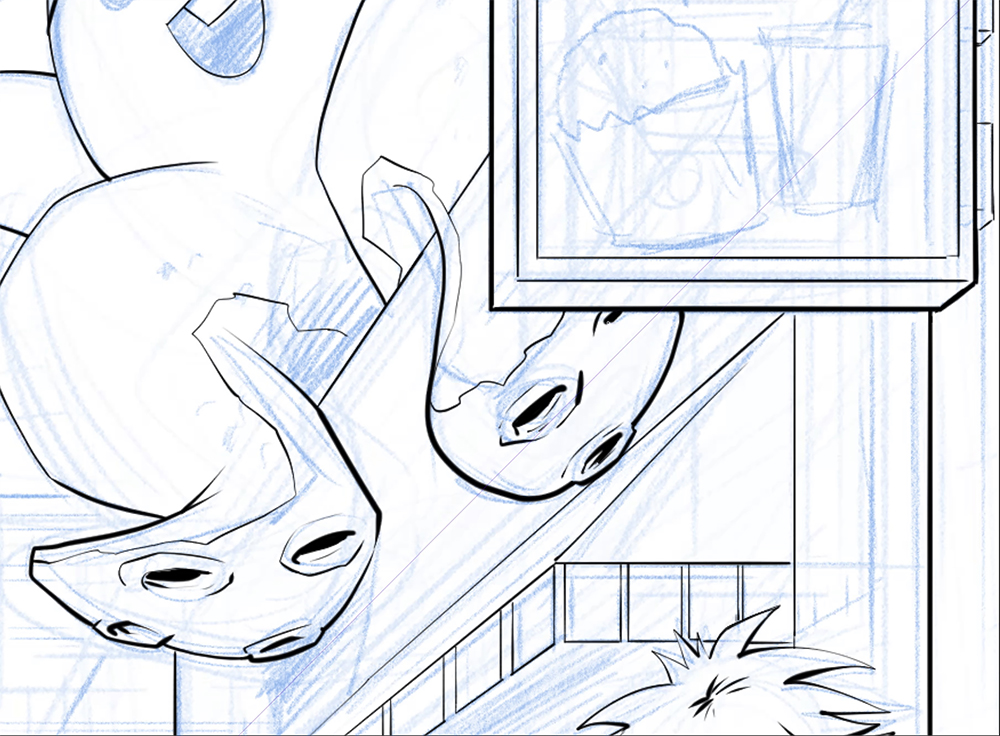
One matter you want to go on in mind, in guild to proceed your characters and piece of work more conceivable, is to retrieve your light source direction.
I have the low-cal source located in the upper left of the scene, so I brand sure to brand the outline thicker on that the areas that wouldn't go hit with light equally much. This gives the illusion of shadow and helps give objects more book. Take for instance the tentacles of this cute octopus. I have thicker lines on the underside of the tentacles, and lighter lines on the top.
Step six
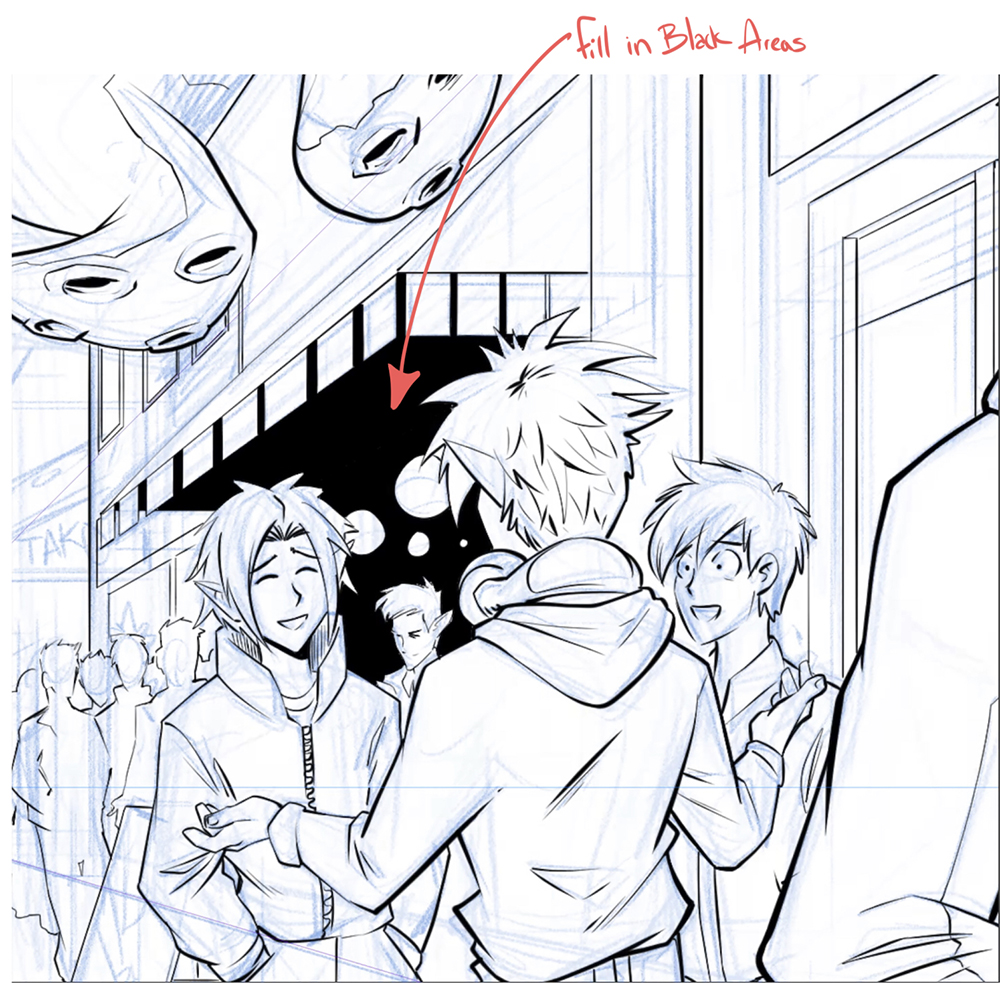
Later yous're mostly washed inking, you lot tin offset filling in the blacks.
Pace 7
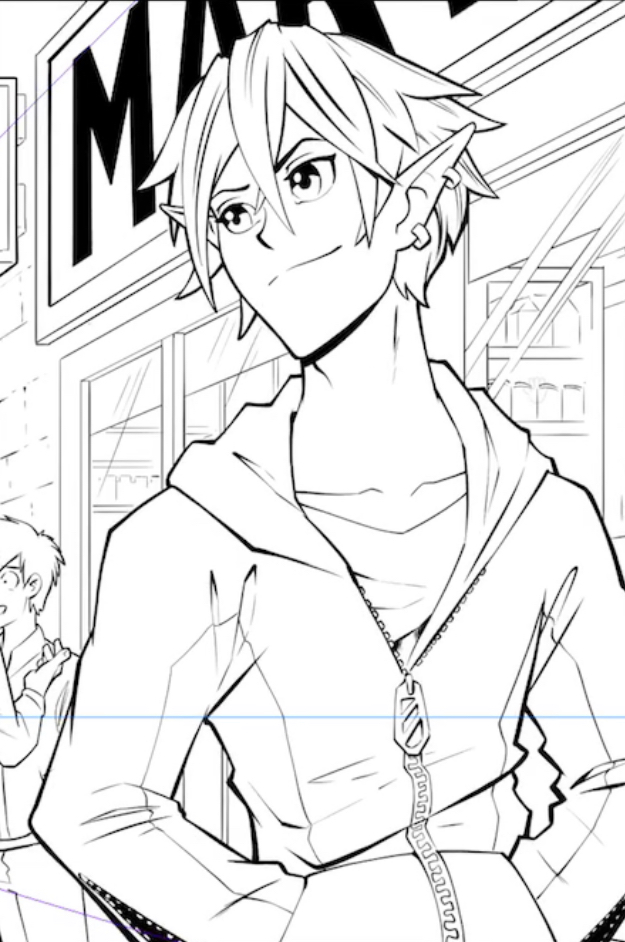
Look over your illustration and arrange your line weights accordingly. A lot of times I observe myself jumping around a piece and may non call up to thicken some of the lines. For example, the main character of this shot, in the foreground, I thickened upward the lines to make him pop a bit more, and actually divide him.
Final stride
Now it'southward fourth dimension to clean up, look over everything and clean lines that shouldn't be intersecting or are just not supposed to exist there.
That's all for that illustration, but here are some quick tips earlier we wrap this up.
Tip #ane
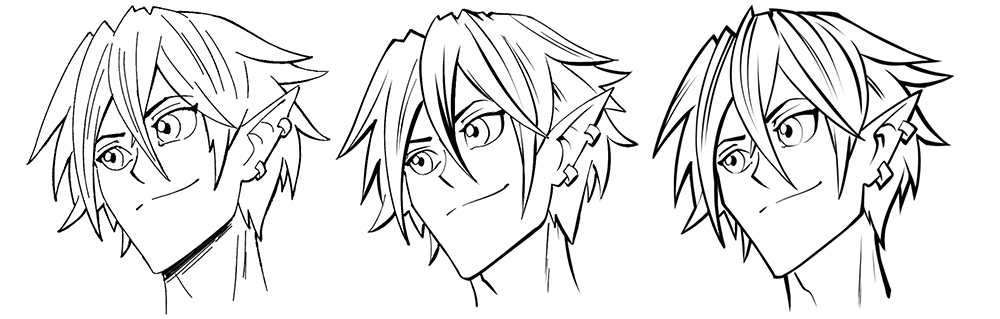
Every creative person has their own manner, that goes for inking style as well. Here are some examples of inking styles.
Tip #ii
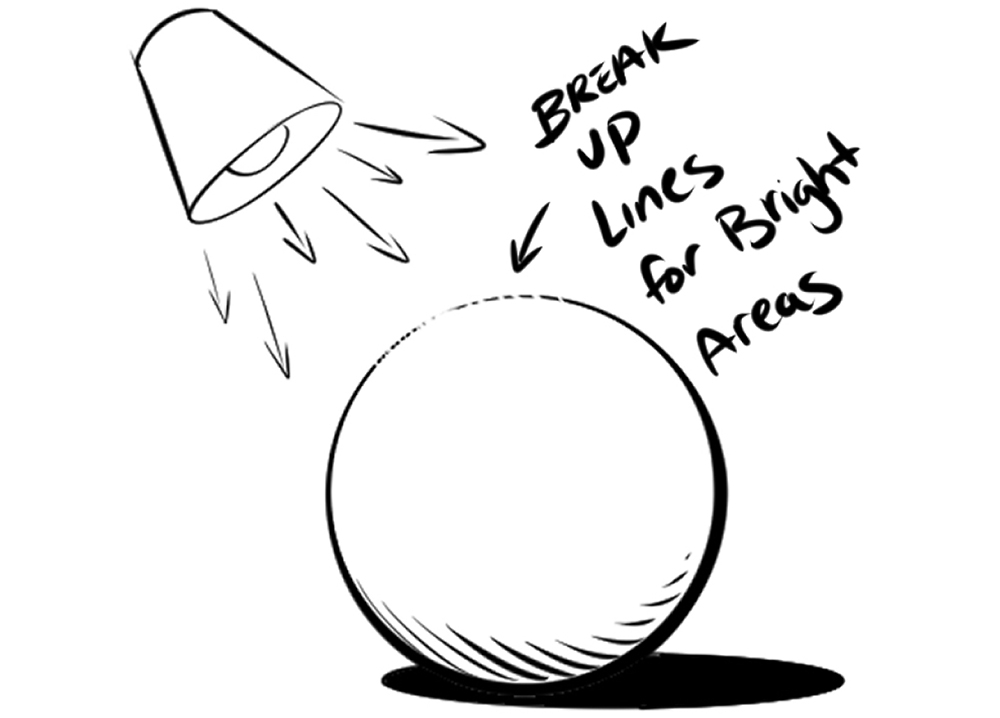
You tin can depict a bright light hitting an object or person past breaking upward the outline.
Tip #three
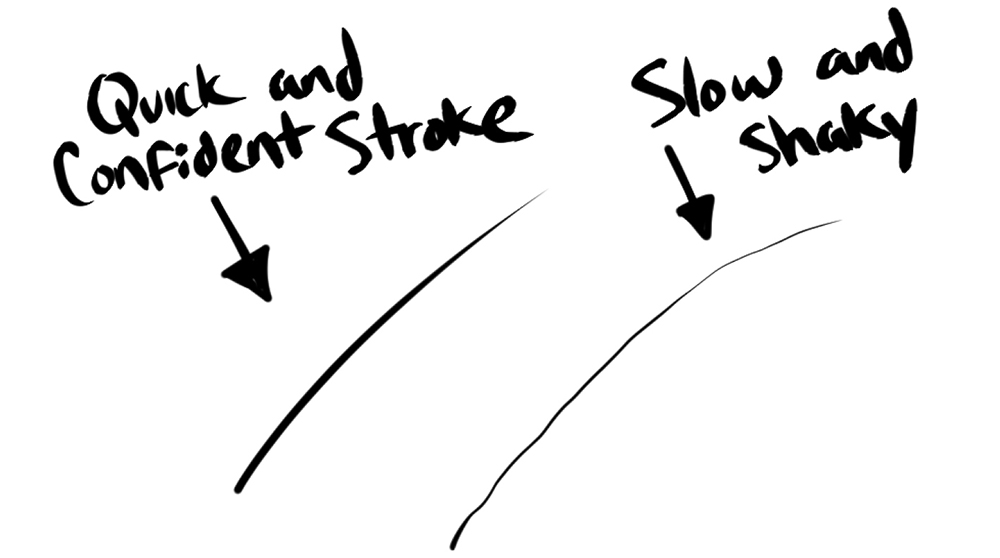
Keep your strokes quick and confident, this is how to can achieve a smoother and cleaner line. A lot of us will have a slight milk shake or wobble to our paw when drawing a line slowly, and we want to avoid those wobbly lines!
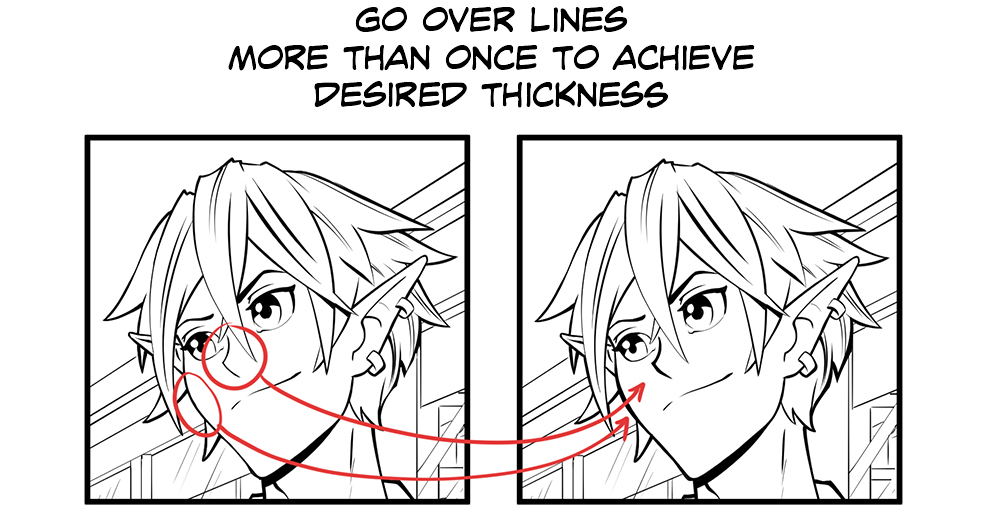
Tip #4
Don't be afraid to go over lines again to get the look you want, not all lines need to be done in ane stroke.
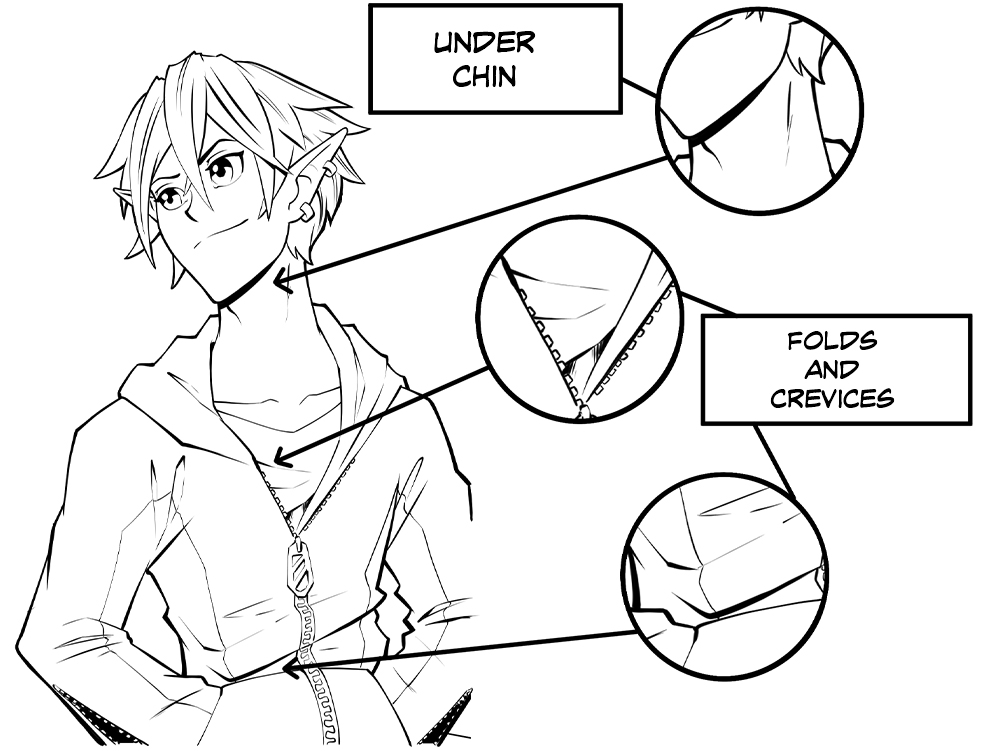
Tip #five
Thicken upward lines in small crevices of folds, cracks, or even areas like under the chin, to create more than depth and brand the art more 3D! These thick lines or areas filled in volition usually be in areas getting little to no lite.
Tip #6
Make areas of your drawing stick out more by adding sharp edges to your lines or by making the line gradually get from thick to thin in the direction of the calorie-free source. This can requite the illusion of something jutting out.
Determination
Thank y'all for taking the time to read this tutorial, I hope this helps you ink your manga or comic more effectively. You lot can now see, how just the outline can help tell your story more clearly, and how yous can use certain tricks to directly the readers optics.
About the Artist
My name is Jose Fernandez, I have washed piece of work in varying kinds of media, but ultimately I consider myself a storyteller. I have storyboarded for blitheness besides as commercials. I did illustrations for the creator owned manga Dodge besides as an indie comic called The Threat. I also did all of the illustrations for the game Heist. In the stop, my favorite matter is to tell engaging stories in the most creative means. If you'd like to make it contact, Instagram is the perfect place! I also mail service all my latest works in that location, and so follow for more than content.
www.instagram.com/josesartcave
reynoldswilitsehey.blogspot.com
Source: https://www.clipstudio.net/how-to-draw/archives/163108
0 Response to "How to Tell Which Lines Should Be Thicker Line Art"
Post a Comment